Deploy to AppHarbor using GitHub for Windows
A few days ago GitHub launched GitHub for Windows, a beautiful Windows Git client. The client is fast and easy to install, it has an attractive Metro-themed design and it lets you do most day-to-day Git operations such as checking out, branching and committing with ease. Git has always been our favorite source control management system, and we love this new way to manage our repositories. Some .NET can be a bit spooked by the console-heavy interface of standard Git, and at AppHarbor we hope GitHub for Windows will make using Git easier for those folks.
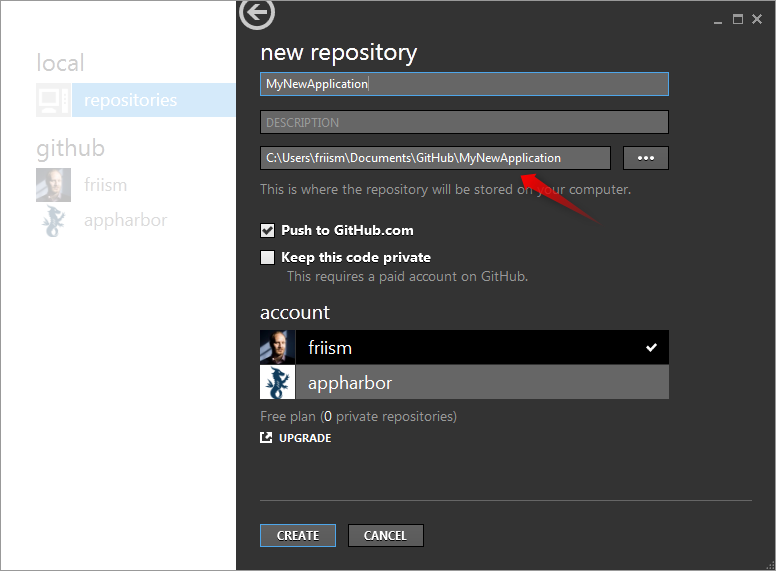
Using GitHub for Windows to deploy to AppHarbor is very simple. Assume we have already installed GitHub for Windows and hooked it up with our GitHub account and say we want to deploy a new application. First, create the repository using GitHub for Windows:

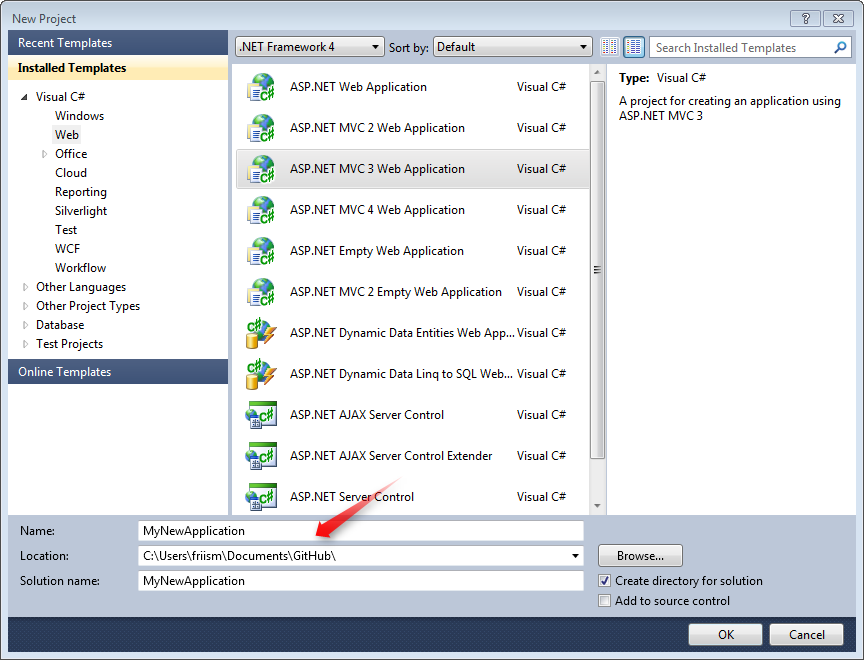
Make a note of where the repository was created on your file system and create an application in Visual Studio using that location:

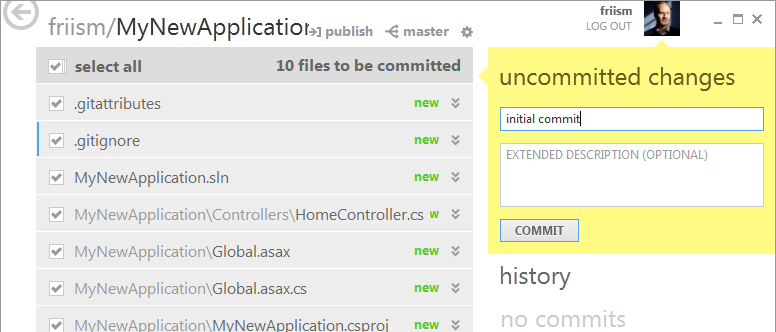
Go back to GitHub for Windows and commit the newly created project:

Go to appharbor.com and create a new application to run your project. Head over to GitHub and configure the AppHarbor service hook as you usually would. Now hit "Publish" in GitHub for Windows to send your code on its way.

GitHub for Windows will push your code to GitHub which will notify AppHarbor of the new commit. AppHarbor will then download the code from GitHub and build, test and deploy it.
Et Voilà: Deploy to AppHarbor using Git without ever opening a console!
