
Deploying solutions with multiple web projects on AppHarbor
We often help users who want to deploy .NET solutions with multiple output web projects. The conventions for handling this are already covered in the solution file convention documentation, but this blog post will expand on the details. We'll cover how to work with web projects to be run by web workers but the approach outlined is analogous for background worker projects.
How build and deploy works
When AppHarbor builds a solution file, the output of any web projects are placed by MSBuild in a folder in the build output called _PublishedWebsites. Each web project is placed in its own directory.
When the time comes to deploy your application, AppHarbor looks at the contents of _PublishedWebsites. If there's just one folder, we'll deploy that. If there are multiple folders (because your solution had multiple web projects) we will deploy the first one by alphabetical order. Note that the "Set as StartUp project" setting has no effect on the MSBuild process – it's a user-setting stored in the .suo user setting file which should not be committed to source control.
This convention sometimes causes confusion because people have been hacking on a web project in their solution, pushed to AppHarbor and verified that the code was deployed. Visiting the site results in an expected error, however. Often, this turns out to be because AppHarbor has deployed an API or sample web project, not the main site.
Deploying the right site
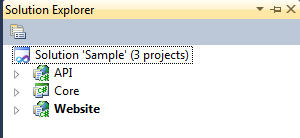
Imagine you have a solution layout like the one above (Core contains functionality shared between API and Website) and you want to deploy the Website project instead of API, which is what AppHarbor happens to deploy per default. To do this, we'll take advantage of the solution file convention and include an AppHarbor.sln file that references just the Core and Web projects:
- Create a copy of the solution file
- Rename the copy to
AppHarbor.sln - Open
AppHarbor.slnin Visual Studio - Remove the API project
That's it! Add the new solution file to your repository and push to AppHarbor. When deciding what solution file to build, we'll choose AppHarbor.sln over any other candidates. This approach generally low-maintenance, and you'll only have to worry about the AppHarbor.sln solution if you rename or restructure the projects in your main solution.
Deploying multiple applications
What to do if you want to deploy two applications from the same solution? On AppHarbor, this is accomplished by creating two applications and pushing the same repository to both. Note that if you're using our GitHub integration you can add multiple application slugs to the service hook and if you're using Bitbucket you can add multiple instances of the AppHarbor service, each pointing at different applications.
Take the Web and Api solution from above and say we've created two AppHarbor applications that ended up getting slugs sampleweb and sampleapi (the parts of the urls that identify your apps). To get the Web project deployed to the sampleweb application, simply rename the AppHarbor.sln solution file (the one that referenced the Web and Core projects) to sampleweb.sln. When building code pushed to the sampleweb application, AppHarbor will notice that there are multiple solution files – none of them named AppHarbor.sln – and pick sampleweb.sln to build. To deploy the Api project to the sampleapi application, create a sampleapi.sln solution file referencing the API and Core projects and add that to your repository. This will be the solution file used when building code for sampleapi.
There you have it! Hopefully this post has given you a good idea of how to use AppHarbor's convention-based build process to successfully deploy solutions with multiple web projects.